Sunday, August 11, 2013

What kind of music do they play at the Hamster Ball?

Meet Speedy. This is Caleb’s cuddly buddy.
IMG_0986[1]

And Tumbles. She’s Kristi’s little ball of cuddles.
IMG_0972[1]

Speedy has invited Tumbles to the Hamster Ball (hamster ball – get it? Caleb thinks that play on words is hilarious!)

Tumbles was thrilled with the invitation (apparently) but she needed a dress for the occasion. This is where the refashioning comes in. Caleb picked out an old princess valance from my stash as Tumbles soon-to-be ball gown. We chose to use the bottom so we didn’t have to create a new hem. And it says '”Princess” – that’s perfect for a hamster’s ball gown, don’t you think?
IMG_0975[1]

I gave it a quick press, and then we very carefully and accurately (ha!) measured what we needed to create a simple gown. (Very simple, given Tumbles…um…unique body type.)

IMG_0976[1]
(Thank you to Caleb for taking this picture.)

Our gown is cut out.
IMG_0977[1]

I was just planning on an elastic waist, so I pulled out some reclaimed elastic in my stash. Once again, I carefully measured the elastic – or maybe I just stretched some around Tumbles and cut what I needed.
IMG_0978[1]

I thought it would be more time-consuming to create a pocket for the elastic than to just stretch it and stitch it in, so I got Caleb to help me while I pinned the elastic with the top of the fabric folded over it – an extra hand is very helpful.
IMG_0979[1]

I stretched as I stitched and got a nice gather.
IMG_0980[1]

One seam up the side, and our ball gown was done!
IMG_0981[1]

IMG_0982[1]
We tried it on her below her hands, and didn’t like the way it looked. We decided if we covered her hands up she’d keep them to herself during the dance. As you can see, we also gave Tumbles a sparkly headband to make the ensemble shine.
IMG_0983[1]

Here they are, all ready for the ball. Speedy got all gussied up in his best tie, and they headed off to dance the night (or day) away.
IMG_0985[1]

Oh, and in answer to the title question, I suspect that these were included in the playlist…

Thursday, July 11, 2013

Meet My Alter Ego

Have you seen the duct tape dress forms on Pinterest? My friend Jessica and I decided to give it a try. We did mine first, and kinda learned as we went along…

dress form 1
I hate to show off my…um…curves…so clearly, but we wanted it to be as close to my actual shape as possible.

dress form 2
No boring duct tape for us! There are too many fun options to use boring old grey tape.

After each of us was taped we cut up the back of the shirt and tape and removed our new form. Now it’s time to stuff ‘em! It’s too bad I was too busy trying to keep polyfill in my form – Gavin (my littlest man) was “helping” Jessica with hers and I would have loved to take some video. He was picking up polyfill from the floor and shoving it in with her until he ran out of polyfill on the floor – then he started taking it out of her form and putting it in mine. Open-mouthed smile So helpful!
dress form 3

dress form 4
Jessica traced the bottom of her form on a piece of cardboard (a Huggies diaper box – go figure) and then cut it out and stuck it in the bottom. I did mine the hard way – I eyeballed it and taped it on here and there and then trimmed the cardboard to fit.

dress form 5
The bottom of Jessica’s looks so neat and tidy.

dress form 6
Here’s one thing we learned – if you’re going to use the fun, pretty tape, it will probably take more than 3 rolls. If you use the big rolls of grey tape two will probably be good. These were 10 yd. rolls and we needed at least 3 for Jessica, and I (obviously) needed more than 3. I ran out of the Wallflower pattern tape and had to use the miscellaneous rolls I already had around. My alter ego is like me – a little organized and a whole lot mismatched.

We left the sleeves loose and open so we could move the polyfill around.dress form 7
As you can see, the girls headed south without me. That’s another thing we learned – we should have gone a little tighter under the bust, and been a lot more careful forming around it. We both lost fullness and structure in the chest area so we will probably put bras on our forms when we use them. Won’t that be cute? My mismatched, crazy dress form wearing nothing but a bra?

Oh, okay – you convinced me…one of these days I’ll take a picture of “her” like that.

Here’s Jessica’s dress form…
dress from 8

dress form 9

And one more shot of my half-lady – this time she’s partially dressed.
dress form 10
Yup. She needs a breast lift.

Wednesday, July 10, 2013

Time for a tank top

I was going through refashion withdrawals! We’ve been so busy getting 
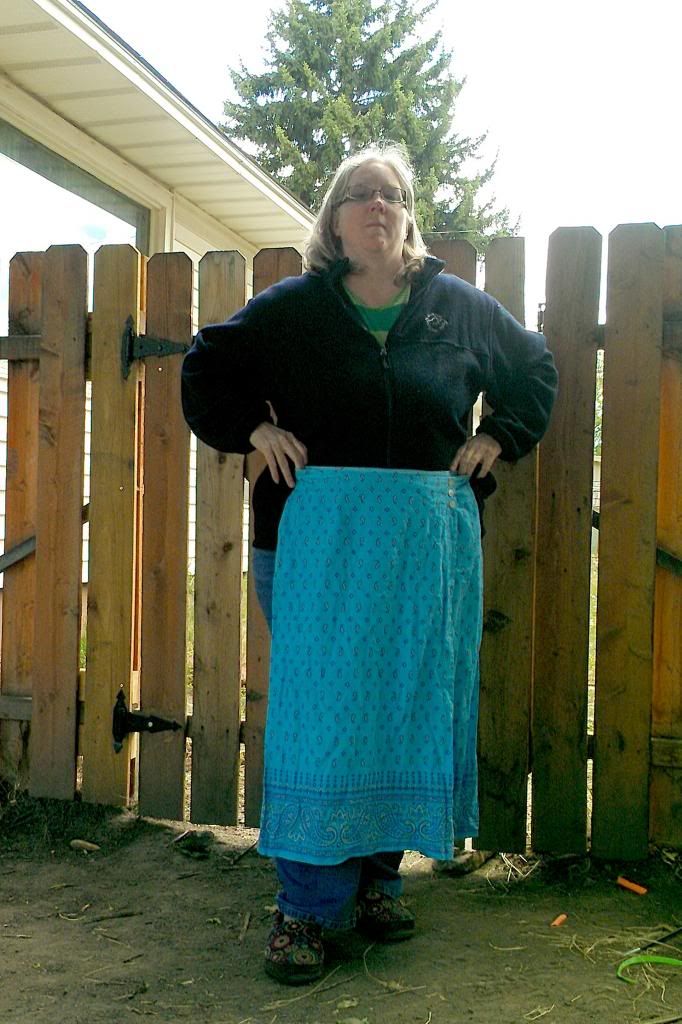
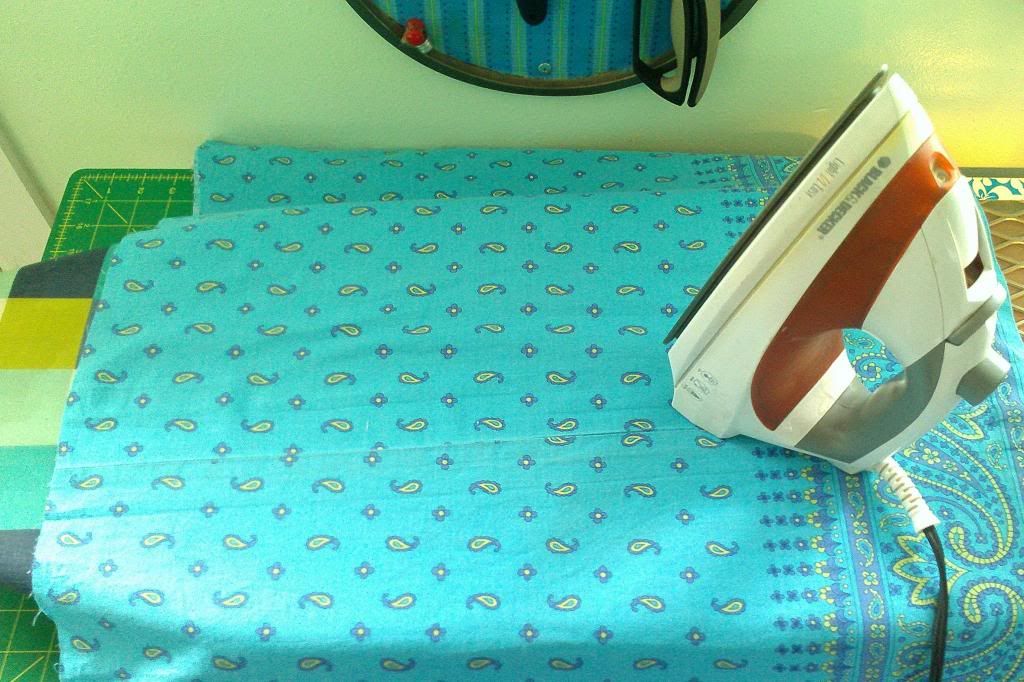
Jemimah (and ourselves) ready for our big vacation that I haven’t had time for refashioning. But today I just couldn’t stand it anymore. I decided that instead of taking care of laundry I would turn this way too big, thrifted top into something useful.

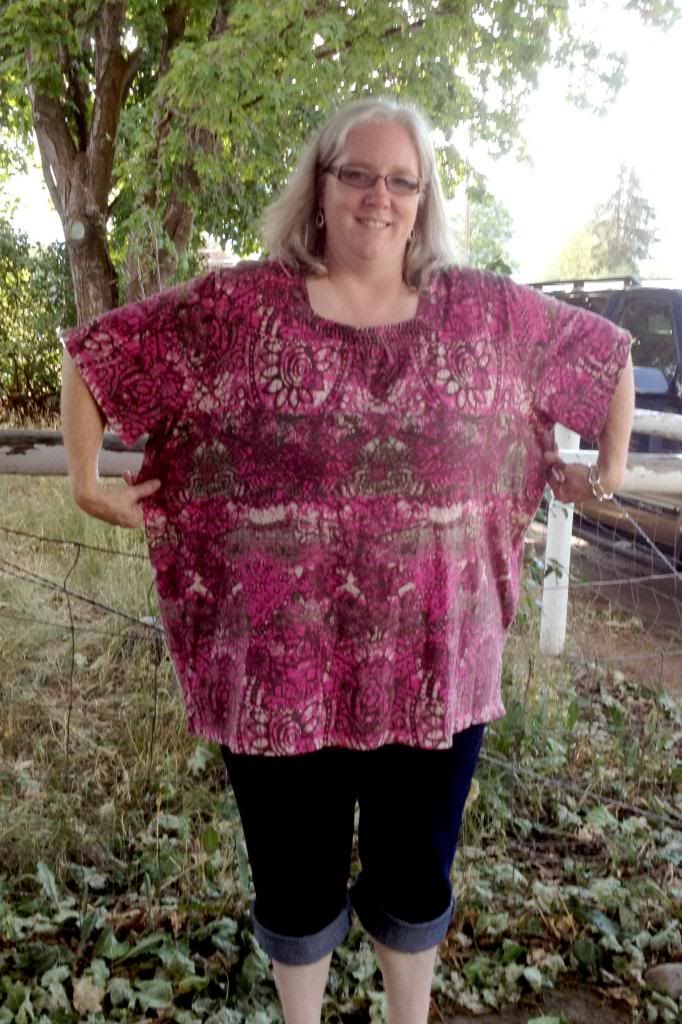
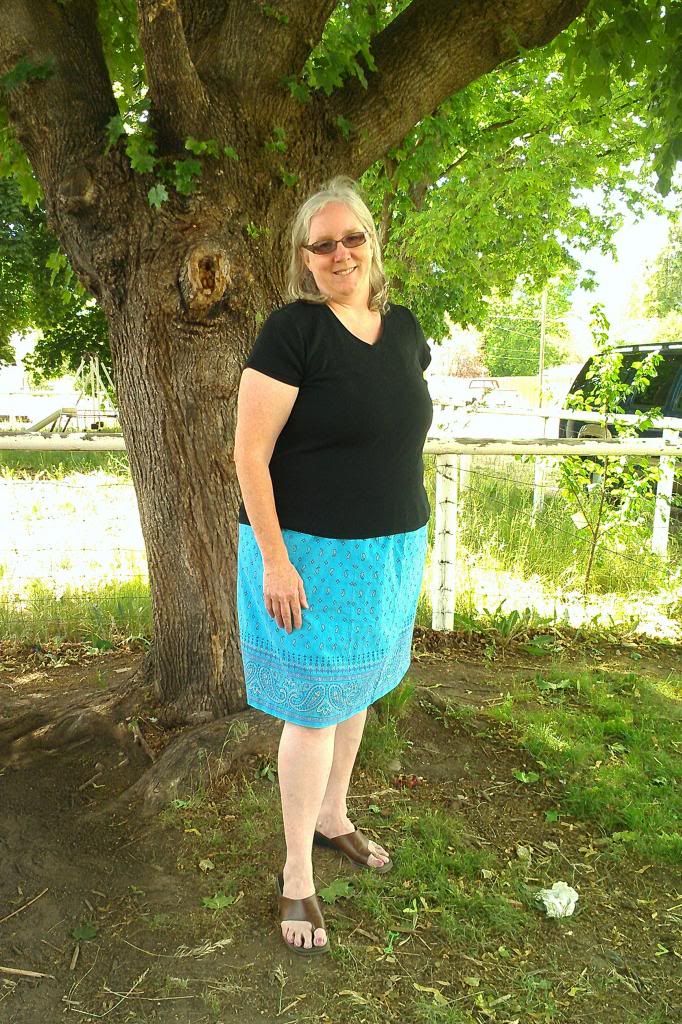
(My 7-year-old took this picture. Not too bad!)
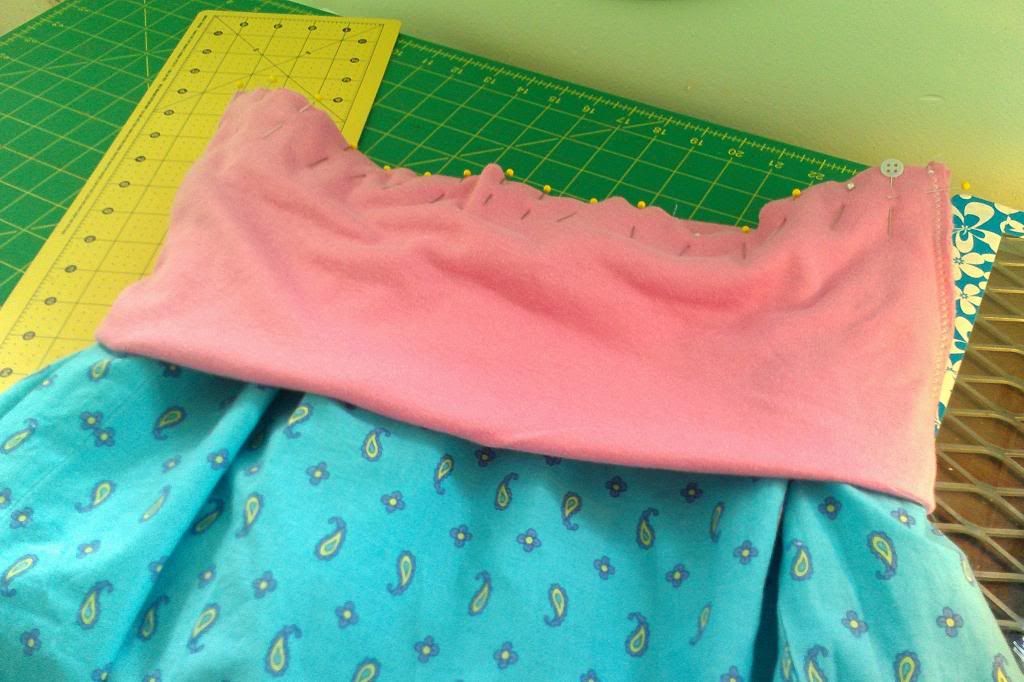
I liked the squared and gathered neckline, so I wanted to keep that intact. I decided this was going to be a tank top, and I wanted wide shoulders, so I started there. I tried the shirt on inside out and figured out how wide I wanted the shoulders to be. I added an inch for a hem, then marked that spot on each side.

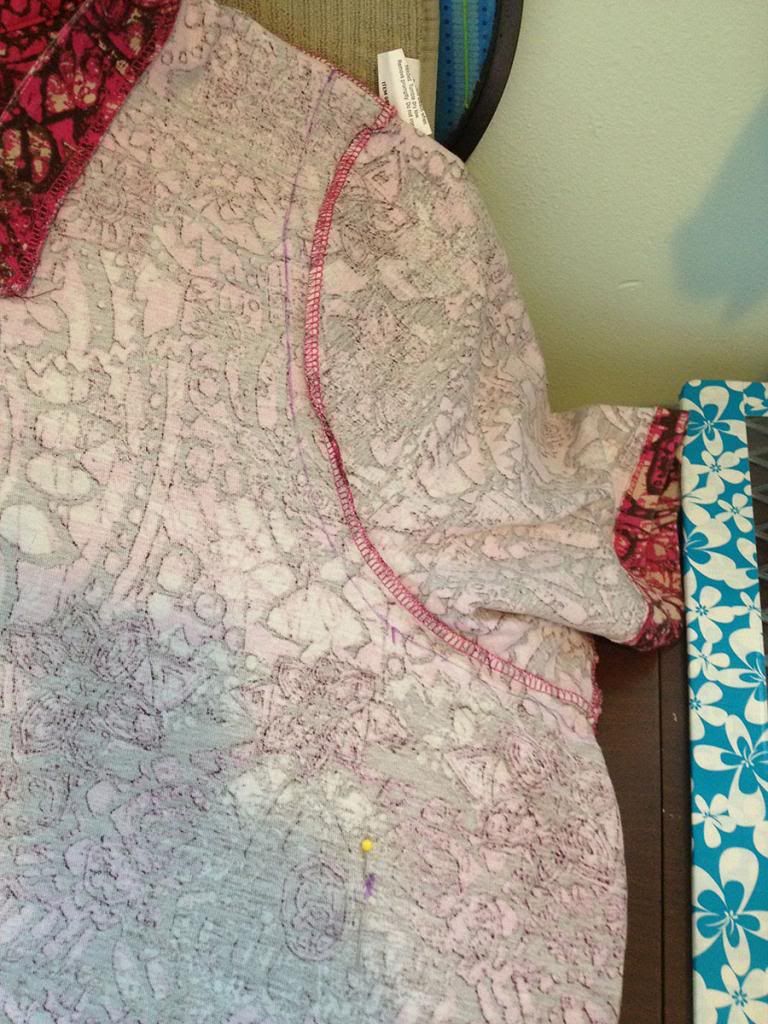
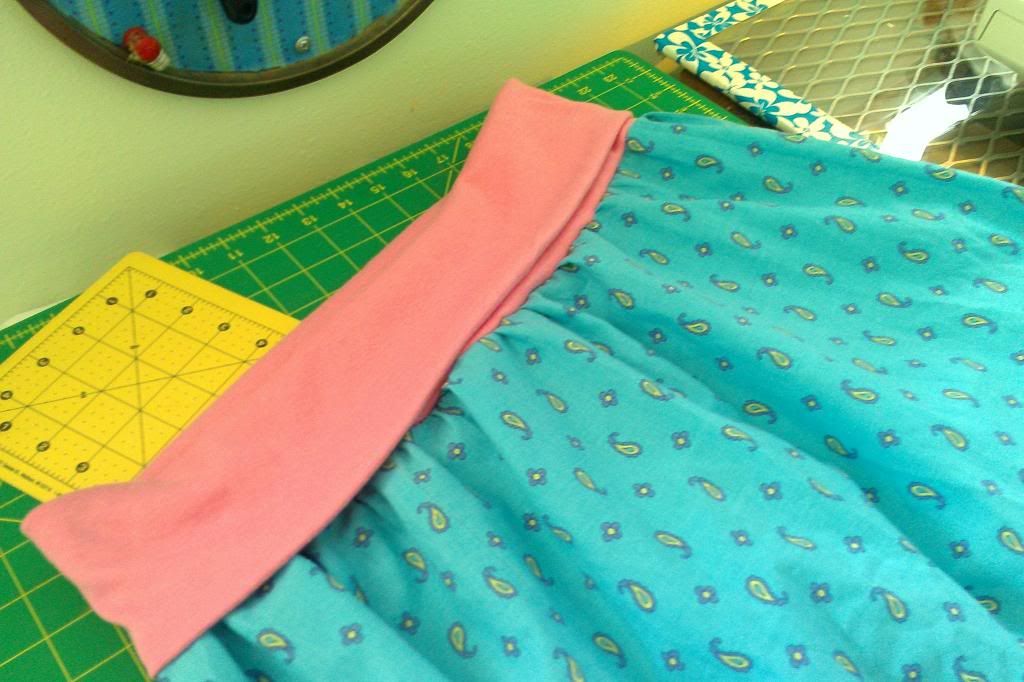
From there I just followed the curve of the existing sleeve to mark where I was going to cut. I cut that sleeve off, then folded the shirt in half lengthwise so I could use the cut side as the guide for the other side.

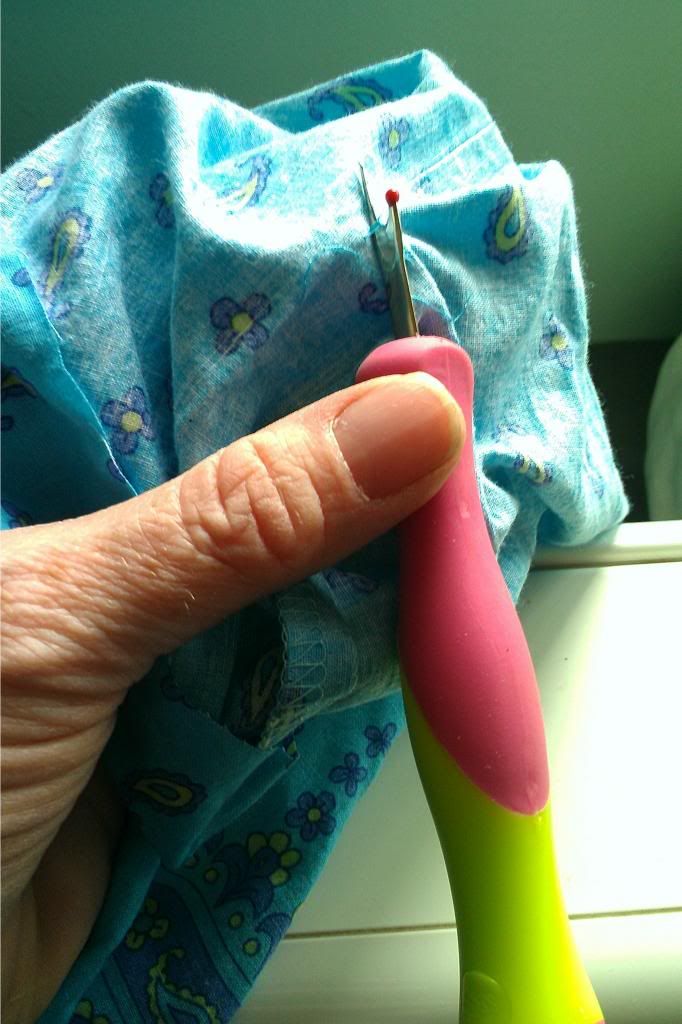
I tried the shirt on again (inside out) and determined where I needed my new side seams to be. I pinned a few places down each side – gotta love taking clothes off with pins in – and marked those spots with my disappearing ink marker. When I laid the shirt back down on the table and flattened it all out I was able to connect those dots and see a nice almost-princess-cut taking shape.
On the first side I added a half inch seam allowance as I was cutting (because the line I had drawn was my desired seam line).

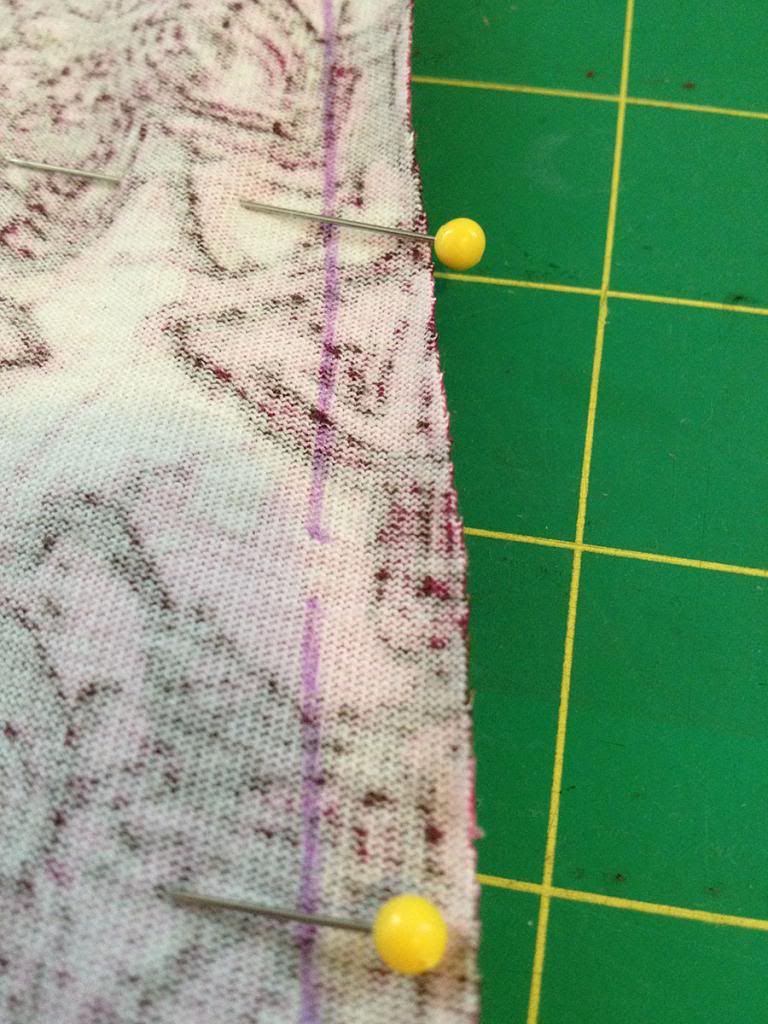
Once again I folded my shirt in half lengthwise and used the cut side as a guide for the second side. This time I didn’t have to add the half inch seam allowance because it was already figured into the first cut.
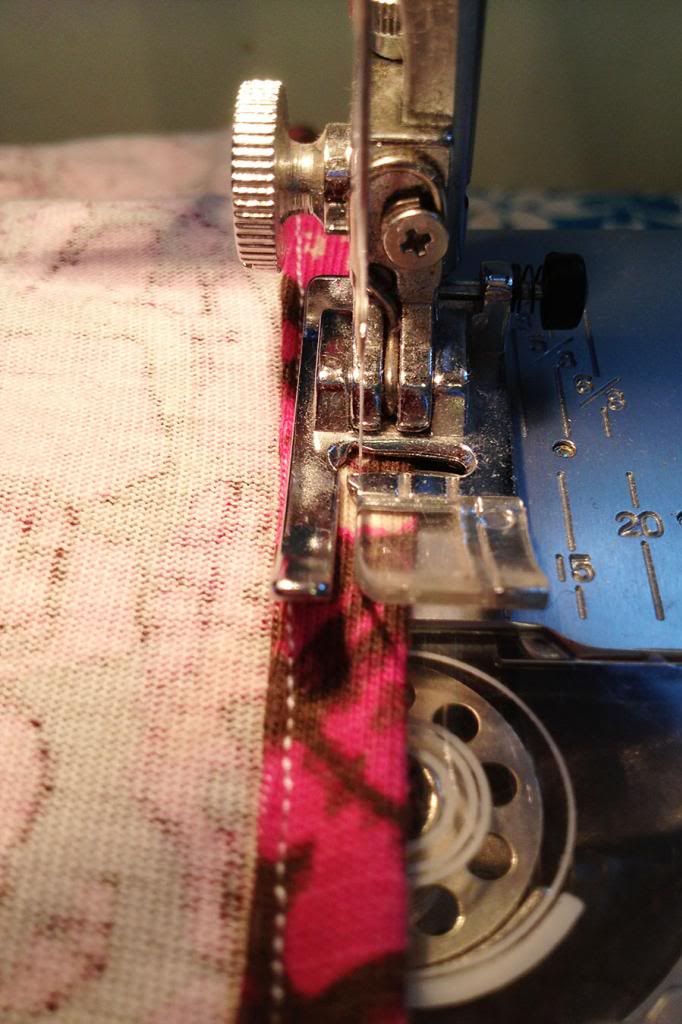
Now that all the cutting was done it was time to start stitching. I did the armholes first. I’m a risk-taker (Open-mouthed smile) so this was eyeballed.

Stitch, talk with kid, stitch, referee yet another disagreement, stitch. It took a while to get this part done because most of the 9 kids that were in the house at the time had to come running to me to complain about someone else.
I went around the armhole once very close to the inside edge of the hem, and then went around again about a quarter inch from the outside edge because I like the finished look of the two rows of stitching.

After both armholes were finished I did the side seams – they were superdy-duperdy easy because they were just a straight stitch with no complications. All done. Time to try it on again.
I didn’t get a shot of it at this point…I think this was when I had to stop my toddler from running down the hall with a fork in his mouth.
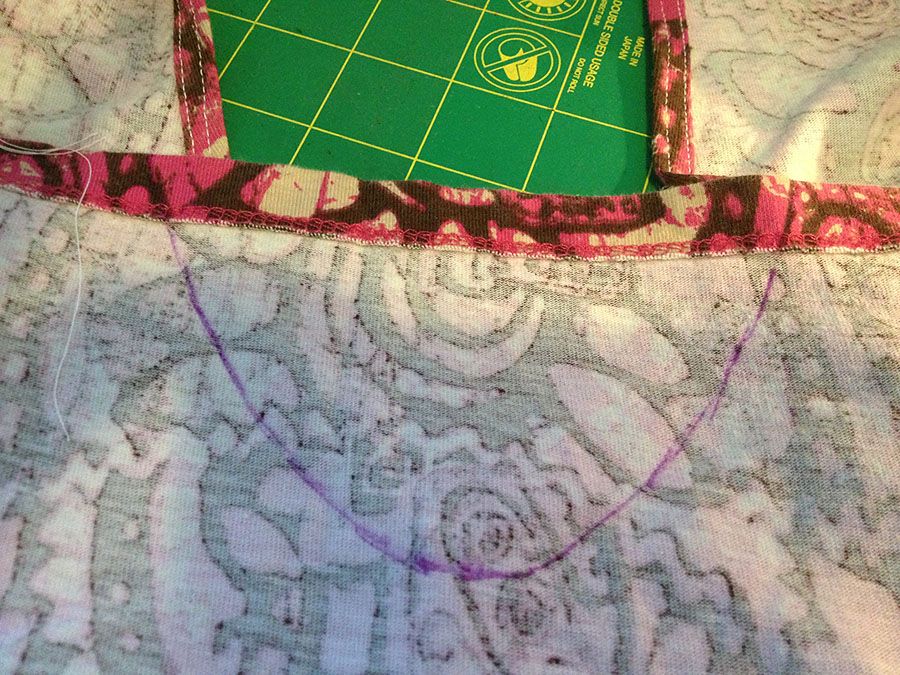
When I tried the top on I found that it needed bust darts. I’d never done them before, but it was obvious that they needed to be there. I also saw (as I had expected) that the armholes were too low for modesty. Both problems seemed easy to fix.
Bust darts – worked like a charm.

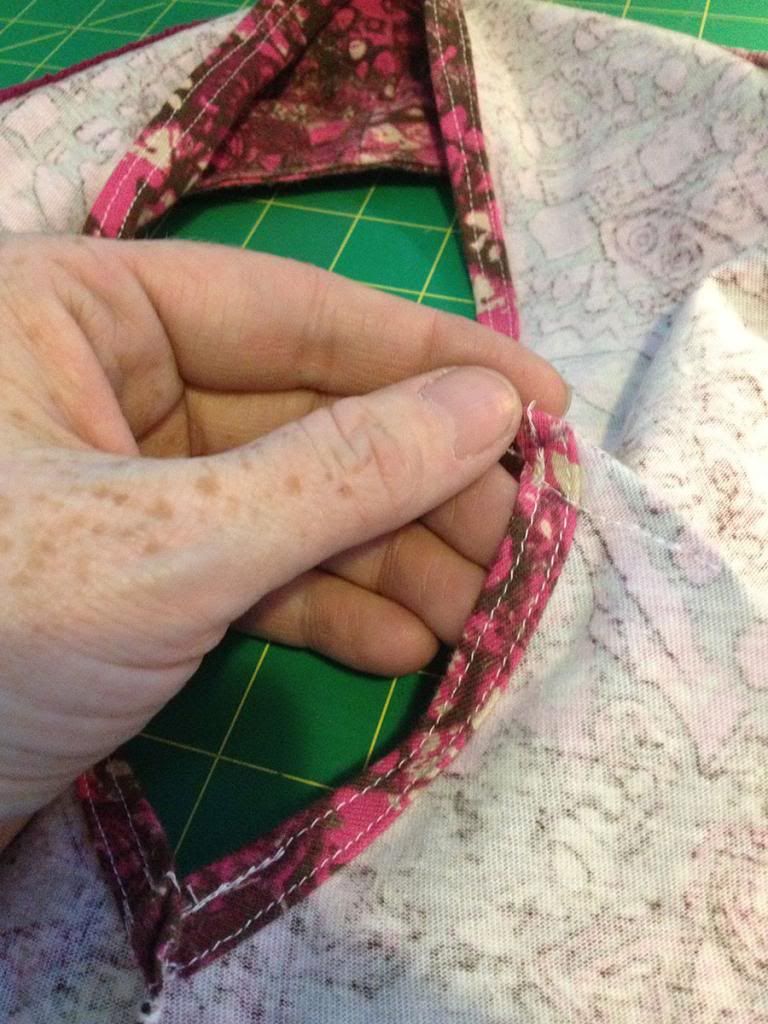
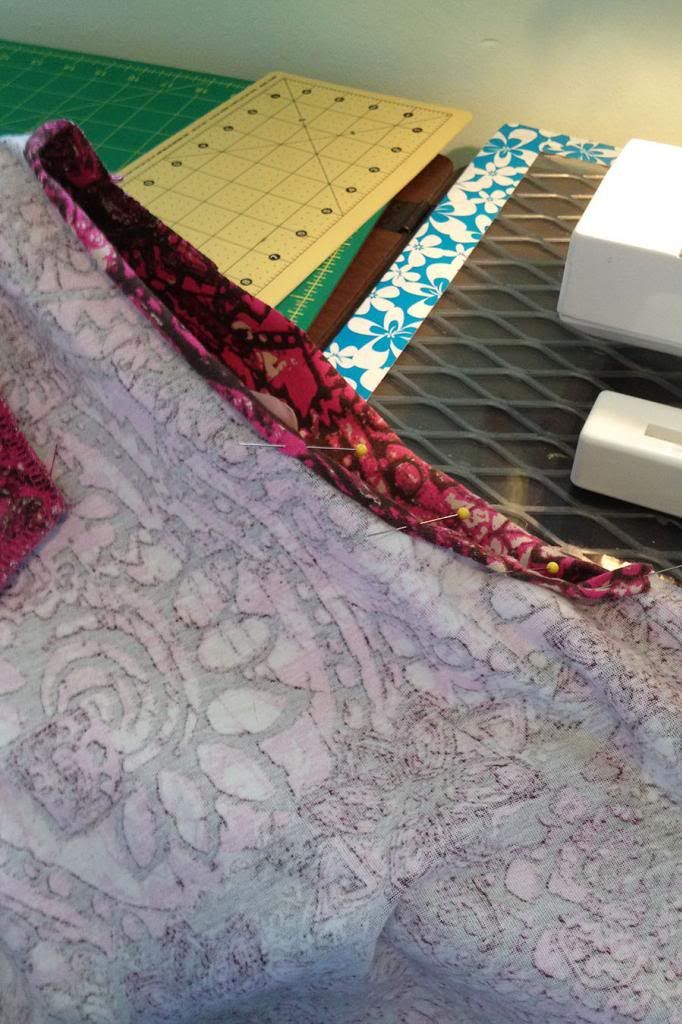
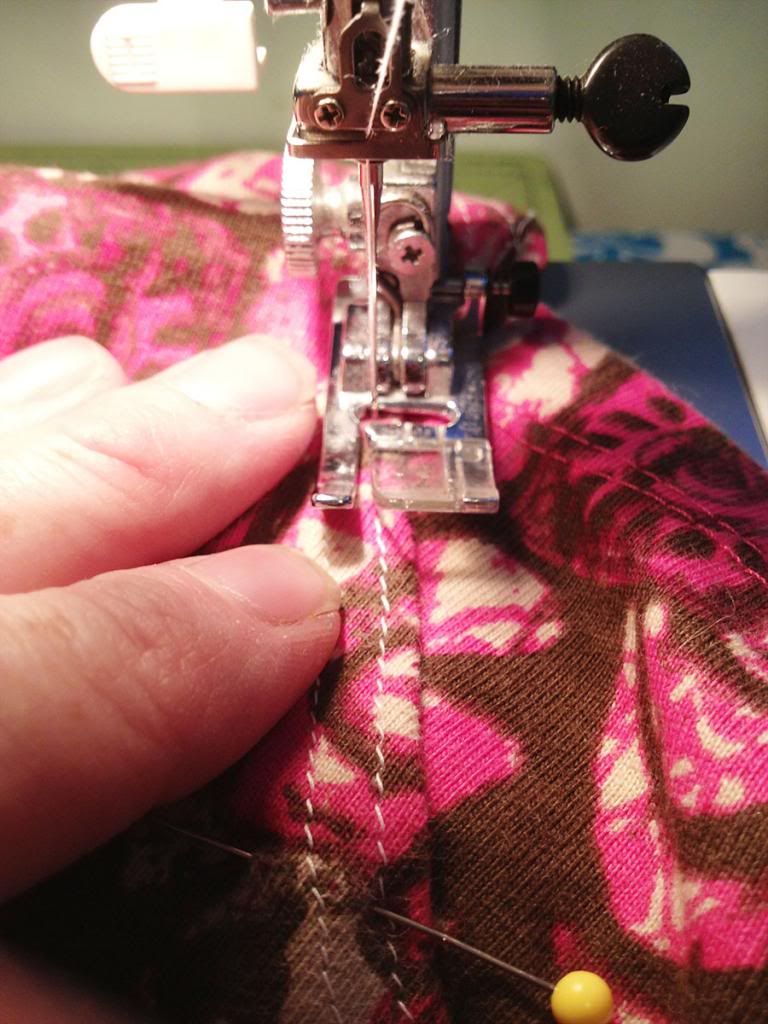
I needed to put a bit in each side for modesty, so I grabbed one of the sleeves I had cut off because it had a finished hem. To get the right size I just laid the sleeve piece over the armhole and traced about a half inch beyond the existing hem. Does that make sense?

I just felt along the hem and drew my line about a half inch past it. Then I cut that out, pinned it on, and flipped it over. I wanted to sew it on the right side because I wanted to sew along the stitching that was already there – I was hoping that would make it a little less obvious as an addition.

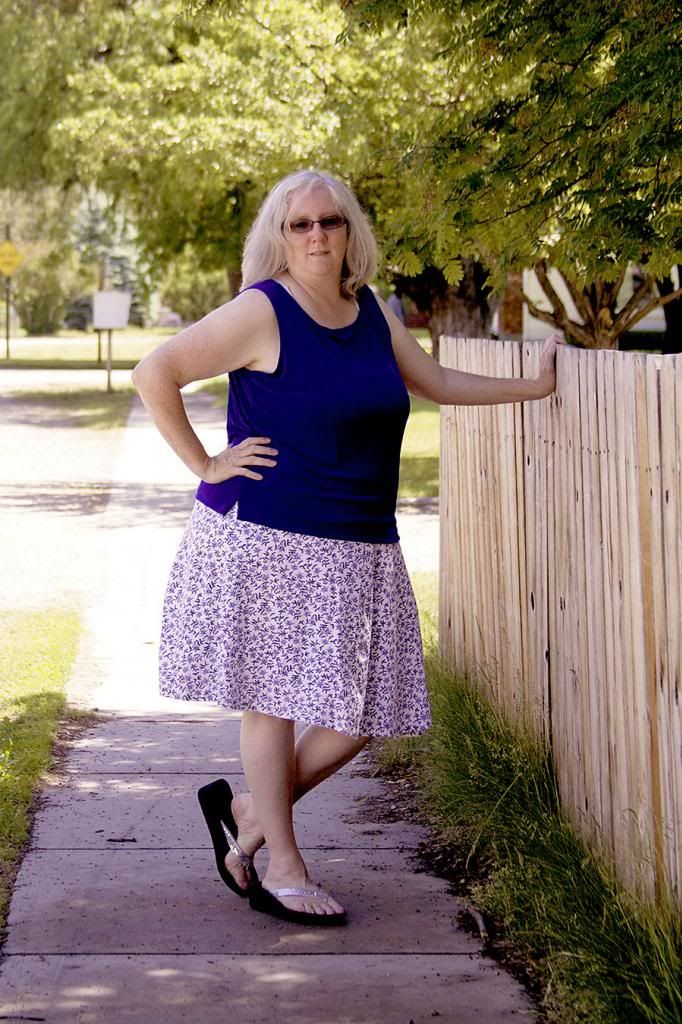
After those pieces were added on each side, the top was done. Time to try it on and rejoice! And rejoice I did – it came out exactly as I had hoped! What were the chances of that?? This was my first time refashioning a shirt, and my first time creating my own refashion completely from scratch. So happy!


I've linked up at these blogs... button    
Wednesday, June 26, 2013

Do you use Google Reader?

Hi friends. If you’re following my refashions using Google Reader it’s time for a change! You probably already know that Google Reader is going away, so you know that you need to find a new way to follow your favorite blogs. The one I have decided on is Bloglovin’ – it is actually easier and has more features than Google Reader, so I’m very pleased with it.

I look forward to seeing you in the blogosphere!

Monday, June 24, 2013

Summer Skirt Series?

I wasn’t planning on a summer skirt series, but my first two refashions after starting this blog just happened to be skirts. I have discovered that I like knee-length-or-just-below skirts, and they’re so comfortable in hot temperatures! (Well, they would be if we would just have some hot temperatures.)
A couple weeks ago I found the skirt in this photo at a thrift store, and I liked the idea of taking the bottom part of the skirt and adding it to something else to make a new garment.
2013-06-24 10.10.52
The top part was too slim for my generous hips, but there’s some good elastic in the waistband, so that’s a bonus. I looked around the store a bit to find something that would work with the white-and-floral knit and found the navy striped shirt. It’s a nice, soft knit with good stretch, and the navy works fine with the white/navy print. I decided I would use the body of the shirt to make a yoga band and use the floral skirt bottom for my garment.
To start off, I used my scientific method to see how much of the skirt top I needed to cut off – I found the bottoms of the pockets, folded the skirt over at that point, and held it up to my body to see where the hem would come if that was where my skirt started. It was perfect. Then I measured how far that was down the sides. It turned out to be 11 inches, so I made marks 11 inches down from the top in 6 or 8 places across the front – I wanted to make sure I got the right curve in the skirt, so I didn’t want to cut straight across.
2013-06-24 10.12.31
When I connected all those marks and cut it along my curved line I had the swirly, swooshie part of the skirt.
2013-06-24 10.16.40
Next, I laid the shirt out and measured from the sleeve/side seam down to the bottom of the seam. The length was 15 inches – just one inch short of what I used previously for my yoga band, so I decided that was close enough. All I had to do was cut across from underarm to underarm (I was even able to follow the white stripe), and then across from where the side seam split on the left to the matching spot on the right side. Voila! I had a yoga band! Normally, I make them about 42” around, but this was 52”, so I laid it out flat (now it was 26” because it’s already a circle) and cut off 5 inches. That took a total of 10” off the band. I stitched up the seam to make it a circle again. 2013-06-24 10.25.21
Now it was time to put the two together. I folded this circle in half to make my yoga band – it’s 7.5” now – and started pinning it to the right side of the skirt with raw edges together.
2013-06-24 10.33.39
Once the pinning was done, it was sewing time. Sorry – you don’t get a sewing picture, but I thought it was probably better not to try to manage sewing and a camera. I used a zigzag stitch because I wanted to make sure it had stretch.
So it was all finished up, but the striped knit was much more stretchy than I expected, and the waistband was now too big. When I tried it on, I decided I could take off 2 inches, and ran a quick seam straight down along one side, 1” in from the existing seam. Yay! Fixed!
2013-06-24 10.44.26
(It’s folded here – I didn’t take it in that much.)
So now I have another knee-length summer skirt. Here’s a shot of it in use along with thrifted tank that I recently found with the tags still on.

Here is another option – I have the tank tucked in and the yoga band unfolded.
Yoga band summer skirt from thrifted clothes
Have you been creating? I’d love to see what you’ve been making!
Saturday, June 22, 2013

Welcome to my inaugural refashion post!

Hi! Thanks for coming by to check out what I’ve been up to!

Today’s remake started with a skirt I loved that was thrifted years ago. I loved the fabric, and I wore it several times, but the length was definitely dated, and the skirt was…well, let’s just say it must have shrunk in the wash. A lot.

Here is the skirt before I started cutting…

(What’s the deal with the stuck-up chin? Weird.)

I love the paisley print, and the pattern band at the bottom of this skirt so I decided to lop the top off this thing. I wanted my finished skirt to be about knee length, and my rough measurements told me that if I cut the top section off just below the zipper it should be perfect. That would also mean I didn’t have to mess with parts of a zipper. Whew.

This had a sort of wrap skirt look to it with a pleat and buttons on the side – it was a fun detail, but in order to make a skirt I could wear, the pleat had to go.

Fortunately, it was just a pleat, and all that fabric was there for me to use.

It just took some seam ripping and a bit of ironing…

At this point I discovered that my skirt was going to be shorter than I wanted if I just turned a waistband under and put elastic in it, so I decided to make a yoga band instead. Since I had just done one for another skirt, I knew that if I wanted about 4 inches of waistband (to give me some folding options), I needed a piece of jersey that was 16 inches long (about 4 times my finished length), and 41 inches wide (my waist minus 4 inches). The only color I had in that width was pink, so pink it is.

I folded that in half and stitched the two ends together to make it a circle, then put that over my skirt (skirt was right side out) with the raw edges together. And I pinned the heck out of it because the skirt was much more full than the waistband. I wanted to make sure I caught all the bits I needed to sew.

I used a zigzag stitch to make sure it would stretch, and stitched that raw edge all the way around.

Here is it with the band sewn on and folded down. I was kinda flying by the seat of my skirt, but this project actually came out better than I had imagined it.

I was thrilled with the results! So much so, that I wore it for my evening out with my sweetie and the “kids” (our adult daughter and her husband). I should also mention, as it seems like the thing to do, that the Verona t-shirt is also a thrifted treasure, as are my fabulous Fashion Bug sandals.

And if you’ve read this far, you deserve a bonus. How ‘bout a little Hokey Pokey?

My daughter Jenny (in the black) and I hokeyed and pokeyed.

One last little note - I have a few refashioned items posted over on my family blog, but there aren’t any instructions, so we’ll just call those “inspiration,” okay? For now, I’ll post my refashions and how I did them on this blog.

Thanks again for stopping – I’d love to hear your thoughts!

Oh, and I linked up here - http://www.flamingotoes.com/2013/06/think-pink-sunday-no-118/. Lots of fun projects to peek at on this page!